date: 2016-05-07 title: CodeScan Eclipse Plugin linktitle: Eclipse weight: 20 description: Use CodeScan from Eclipse to get fast feedback on required code changes menu: ide: parent: tutorials layout: ide — –>
CodeScan for Eclipse
The CodeScan Eclipse plugin provides on-the-fly feedback to developers on bugs and quality issues, it is a fully-integrated user experience in Eclipse based IDE.
The plugin is derived from SonarLint but please NOTE that currently the CodeScan Eclipse Plugin WILL NOT WORK ALONG SIDE THE SONAR LINT INSTALLATION. You must uninstall SonarLint.
Installation
- You will need:
- a working SonarQube (6.7.4+) installation
- a licensed CodeScan (4.0.7+) plugin to get started (see here)
- a recent version of Eclipse (CodeScan was tested with Oxygen). CodeScan will NOT work with Eclipse Juno.
- In Eclipse, go to Help > Install New Software…
- Click Add and enter https://www.code-scan.com/eclipse as the location.
- Install CodeScan for Eclipse
- Now you have to set up Connected Mode. With Connected Mode - the rule profiles used on the ‘bound’ server are used in Eclipse.
- In Eclipse, go to Window > Show View > Other > Search for SonarQube. Open the ‘SonarQube Servers’ View
- In Eclipse’s SonarQube server view, right click and choose “New -> Server connection”, or directly do “File > New > Other… > SonarLint > New Server”.
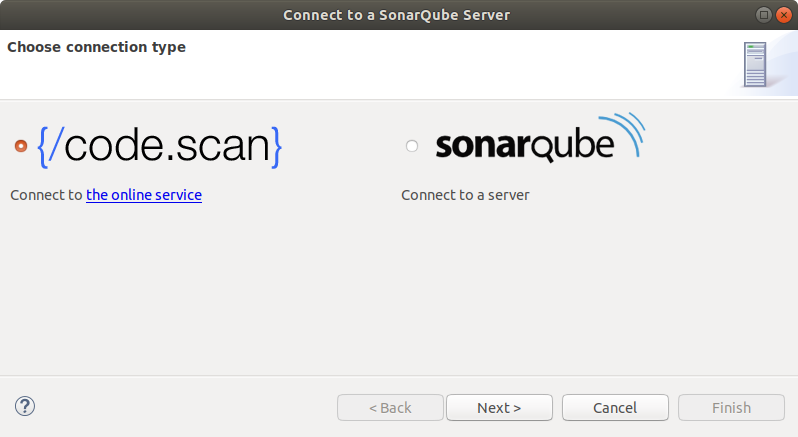
- For CodeScan Cloud
- Select CodeScan Cloud and click Next
- Click Generate Token and you will be taken to the appropriate page on your Cloud account
- Copy the token into the field, click Next and wait for Eclipse to verify the connection
- Choose the organization you want to connect to and click Next
- Name your connection and click Finish
- For Self-Hosted CodeScan
- Select SonarQube and click Next
- Enter the URL of your SonarQube server (default is http://localhost:9000)
- Choose either Token or Username + Password
- If using a Token,
- Click Generate Token and you will be taken to the appropriate page on your SonarQube server
- Copy the token into the field, click Next
- If using Login / Password
- Enter your SonarQUbe Login and Password (default is username:admin password:admin) and click Next
- Choose your Organization (default is default-organization) and click Next
- Name your connection and click Next and Finish to close the wizard and start updating configuration from the server (may take a while)
Binding Projects
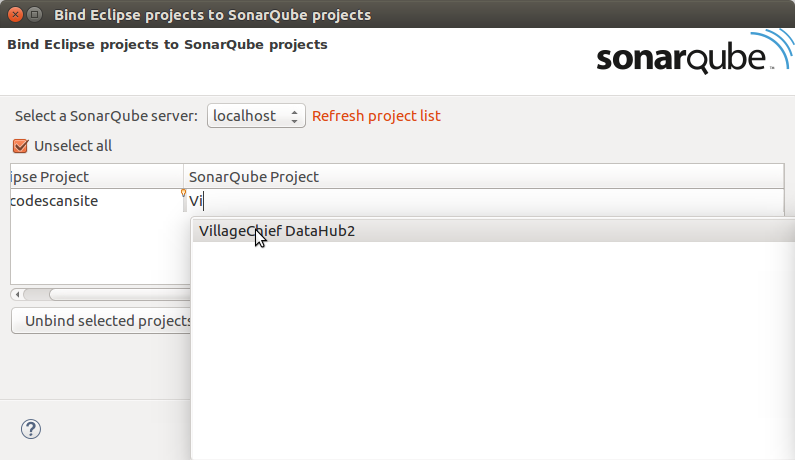
Each Eclipse project needs to ‘bound’ to a SonarQube project. Right click on a project, then click -> “SonarLint -> Bind to a SonarQube project…”
Next to each Eclipse project you need to search for the corresponding SonarQube project name. The “Auto bind selected projects” feature that will try to find best match based on Eclipse project name.
Click on “Finish” to persist the binding. You should now show SonarQube overlay on your bound project icon.
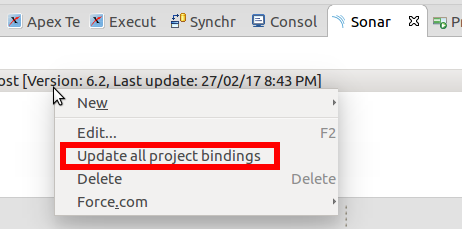
Refreshing configuration
If you need to refresh the local configuration (to retrieve new Quality Profiles and rules), you will need to right click on a server and use the “update” action.
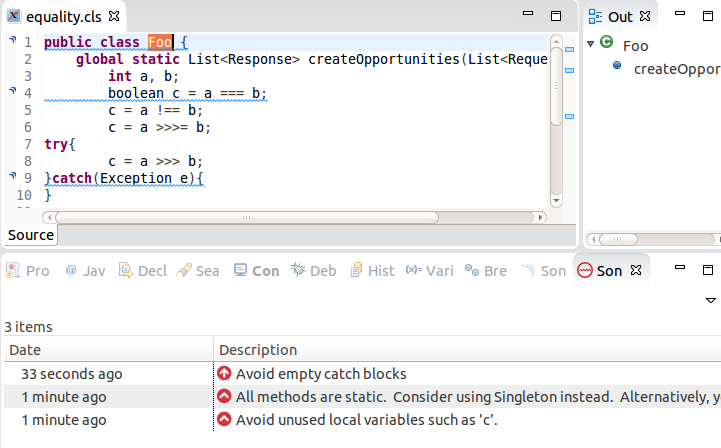
That’s it, you can now code and see CodeScan reporting issues based on remote SonarQube configuration.
Troubleshooting
You can check for any errors here by going to the eclipse console and switching to the ‘SonarLint’ output:
